blog
blog
blog
blog
blog

Developing a JavaScript Form Validator

JavaScript is Fun! Learning JavaScript and creating projects in JavaScript is even more exciting. Today, in this article, we are doing something like that! An amazing beginner level JavaScript project - A Form Validator.

Prerequisites -

  • Basics of HTML and CSS
  • Basics of JavaScript Programming
  • Basics of JS DOM Manipulation

With that said, let’s look at what we are going to develop….

Flutter

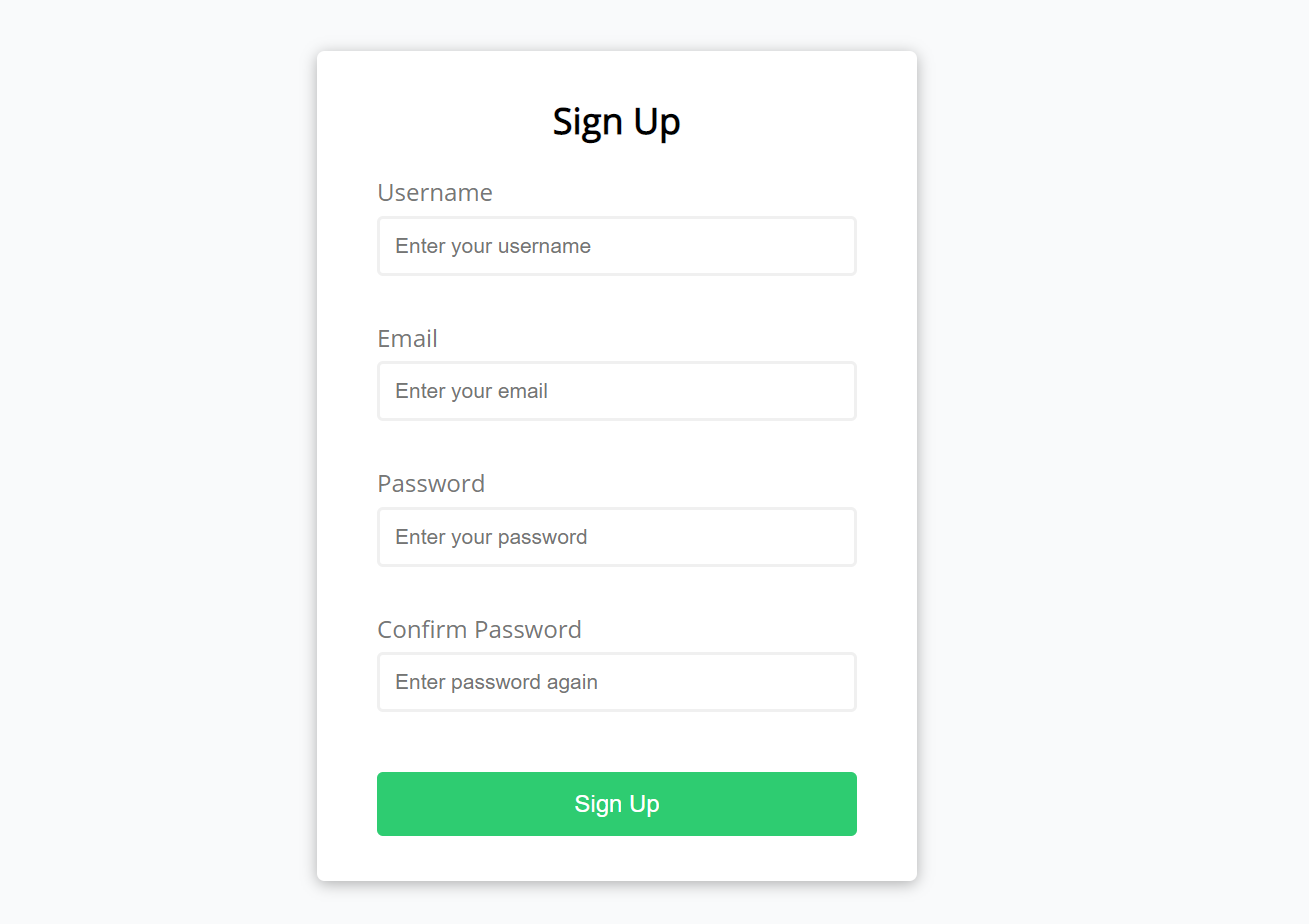
This is a simple Sign-Up form that we are going to develop. This will validate the user input with the following rules,

  • All the fields are required
  • The email should be correct i.e like example@example.com
  • Password and confirm password should match

So, we have got the basic idea of what we want to create, so let’s get started.

Before we start coding, let’s have a look at the interface of the webpage. If we see, We have a centered container which has a form. The form has a main heading, the labels, input-fields, after the input-fields there is an empty place for the error message to show, and in the end we have the Signup Button.

Since now we know the structure, let’s start with the HTML

index.html

                            
                                <!DOCTYPE html>
                                    <html lang="en">
                                        <head>
                                            <meta charset="UTF-8">
                                            <meta name="viewport" content="width=device-width, initial-scale=1.0">
                                            <title>Form Validator </title>
                                            <link rel="stylesheet" href="style.css" >
                                        </head>

                                        <body>
                                            <div class="container">
                                                <form class="form" id="form">
                                                    <h2>Sign Up</h2>
                                                    <div class="form-control">
                                                        <label for="username">Username</label>
                                                        <input type="text" id="username" placeholder="Enter your username">
                                                        <small>Error message</small>
                                                        
                                                    </div>
                                                    <div class="form-control">
                                                        <label for="email">Email</label>
                                                        <input type="text" id="email" placeholder="Enter your email">
                                                        <small>Error message</small>
                                                        
                                                    </div>
                                                    <div class="form-control">
                                                        <label for="password">Password</label>
                                                        <type="password"
                                                        id="password"
                                                        placeholder="Enter your password">
                                                        
                                                        <small>Error message</small>
                                                        
                                                    </div>
                                                    <div class="form-control">
                                                        <label for="passowrd2">Confirm Password</label>
                                                        <input type="password"
                                                        id="password2"
                                                        placeholder="Enter password again">
                                                    
                                                        <small>Error message</small>
                                                        
                                                    </div>
                                                    <button>Sign Up</button>
                                                </form>
                                            </div>
                                            <script src="main.js"></script>
                                        </body>
                                    </html>    


Output -

Form

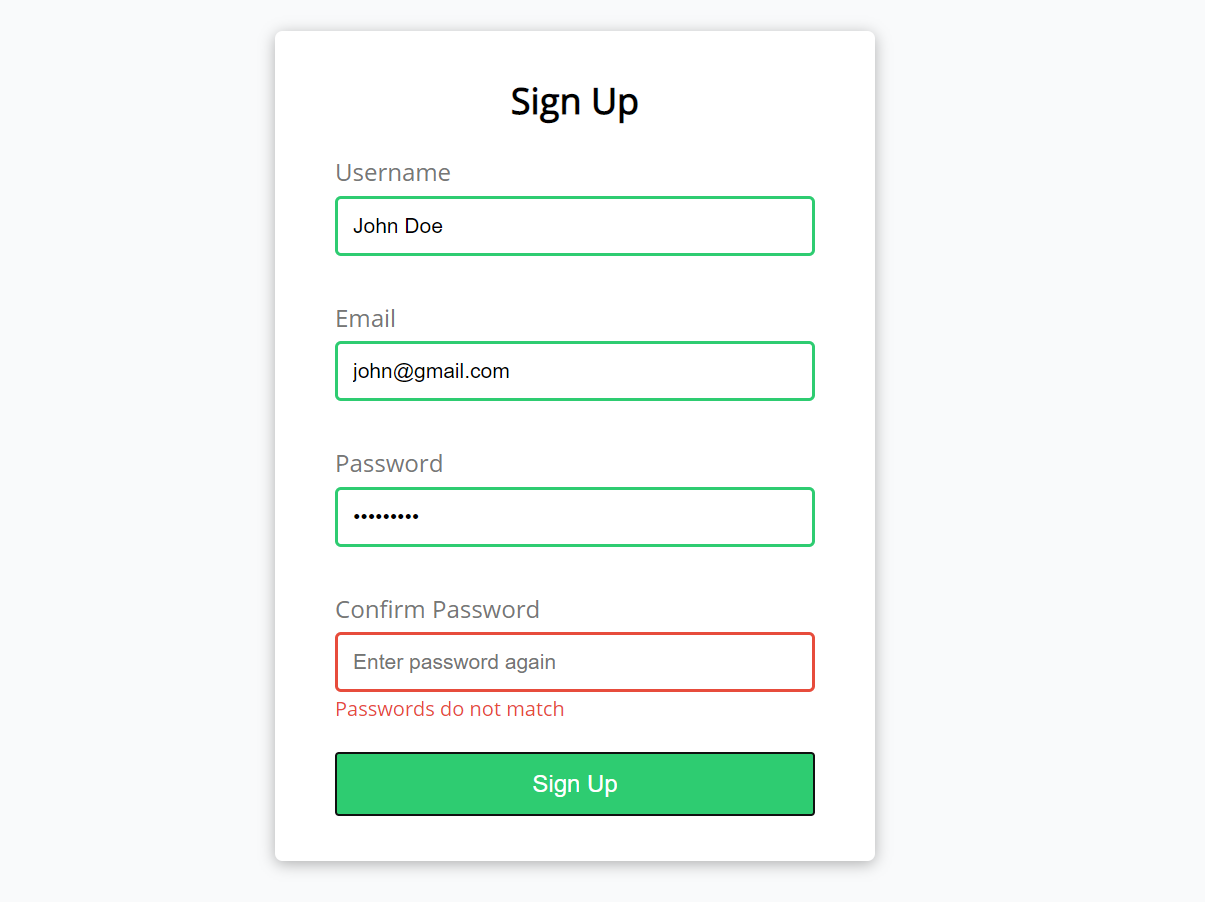
Ok, this looks good, now it’s time to add styling to our web page. One thing to keep in mind is, if the validation is done properly, the border of the input field will be green and if there is any error, we will have to show the error message and the border becomes red.
We will toggle this with the help of JavaScript. Initially, there will be a default border color and the error message will be hidden initially.

So, with that let’s move to the CSS Styling part,

style.css

                                
                                    @import url("https://fonts.googleapis.com/css?family=Open+Sans&display=swap");

                                    * {
                                        margin: 0;
                                        padding: 0;
                                        box-sizing: border-box;
                                    }
                                    body {
                                        background-color: #f9fafb;
                                        font-family: "Open Sans", sans-serif;
                                        display: flex;
                                        align-items: center;
                                        justify-content: center;
                                        height: 100vh;
                                    }
                                    .container {
                                        background-color: #fff;
                                        border-radius: 5px;
                                        box-shadow: 0 2px 10px rgba(0, 0, 0, 0.3);
                                        width: 400px;
                                    }
                                    h2 {
                                        text-align: center;
                                        margin: 0 0 20px;
                                    }
                                    form {
                                        padding: 30px 40px;
                                    }
                                    .form-control {
                                        margin-bottom: 10px;
                                        padding-bottom: 20px;
                                        position: relative;
                                    }
                                    .form-control label {
                                        color: #777;
                                        display: block;
                                        margin-bottom: 5px;
                                    }
                                    .form-control input {
                                        border: 2px solid #f0f0f0;
                                        border-radius: 4px;
                                        display: block;
                                        width: 100%;
                                        padding: 10px;
                                        font-size: 14px;
                                    }
                                    .form-control input:focus {
                                        outline: 0;
                                        border-color: #777;
                                    }
                                    .form-control.success input {
                                        border-color: #2ecc71;
                                    }
                                    .form-control.error input {
                                        border-color: #e74c3c;
                                    }
                                    .form-control small {
                                        color: #e74c3c;
                                        position: absolute;
                                        bottom: 0;
                                        left: 0;
                                        visibility: hidden;
                                    }
                                    .form-control.error small {
                                        visibility: visible;
                                    }
                                    .form button {
                                        cursor: pointer;
                                        background-color: #2ecc71;
                                        border: 2px solid #2ecc71;
                                        border-radius: 4px;
                                        color: #fff;
                                        display: block;
                                        font-size: 16px;
                                        padding: 10px;
                                        margin-top: 20px;
                                        width: 100%;
                                    }


Here, if you notice in the blue part of the CSS code, we have given styling for two classes, success, and error. So we need to dynamically add these classes to the HTML layout using JS based on the validation. If there is no error, we will add the success class, and if there is any problem in the validation, we will toggle the error class.

After the styling, the web page will look like something below,

signup form

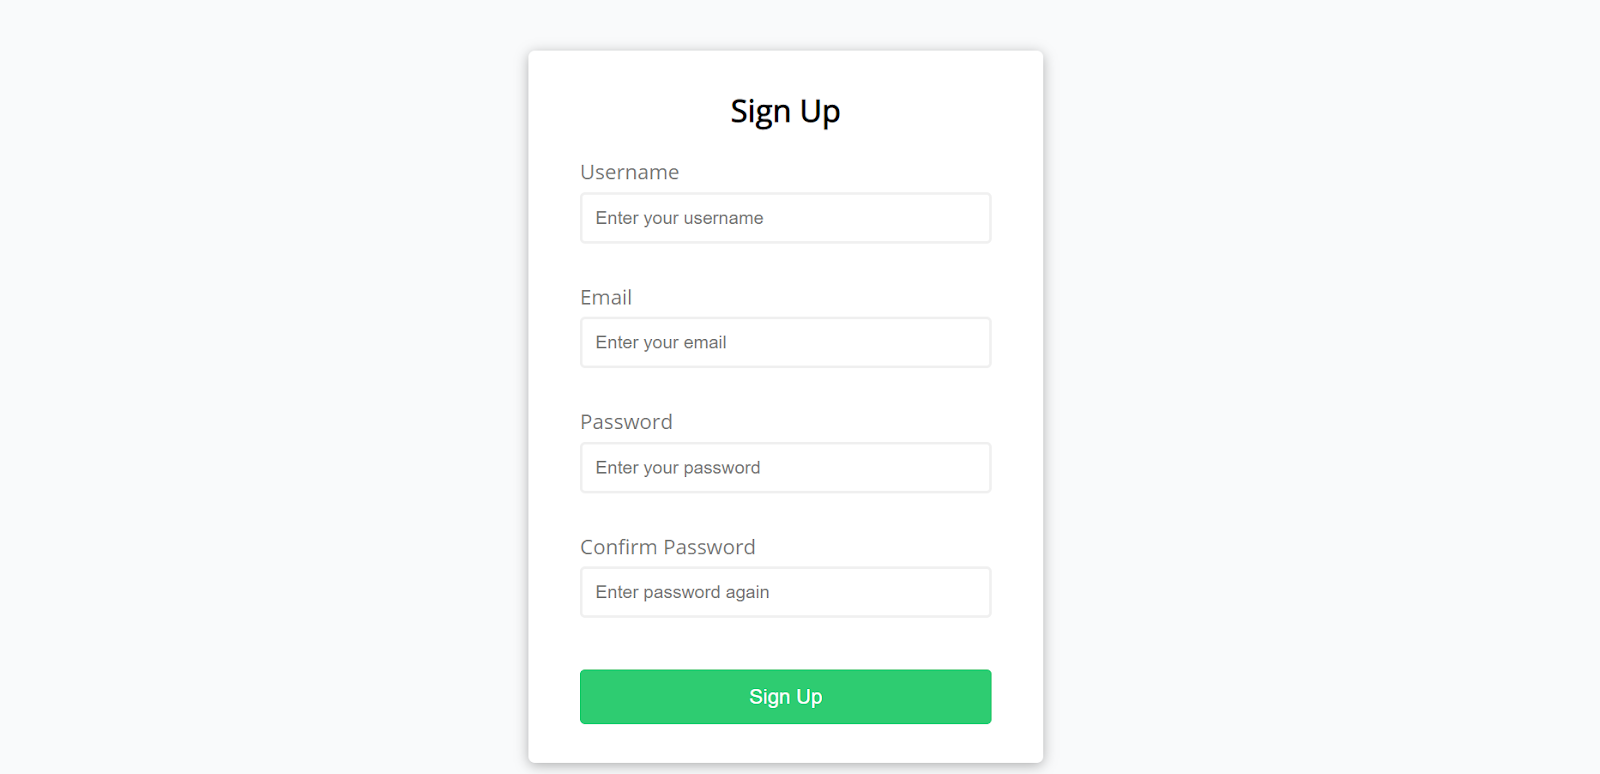
Looks beautiful, doesn’t it? Now let’s move to the main part of this project, JavaScript.

JavaScript - main.js

Step 1 - Fetching DOM elements

The first step is to fetch the DOM elements so that we can manipulate them.

                                
                                    const form = document.getElementById("form");
                                    const username = document.getElementById("username");
                                    const email = document.getElementById("email");
                                    const password = document.getElementById("password");
                                    const password2 = document.getElementById("password2");


Step 2 - Creating a method to handle Success and Error

                                
                                    function showError(input, message) {
                                        const formControl = input.parentElement;
                                        formControl.className = "form-control error";
                                        const small = formControl.querySelector("small");
                                        small.innerText = message;
                                      }                                      


The logic is simple, we will create a method named showError that takes two parameters, the input field element and the error message. In it, simply we will toggle the form-control class and add error to it since we already have styling for it, which makes the border red and shows the error message.

We will use simple logic for the success method. The only difference will be we will just toggle the class to success

                                
                                    function showSuccess(input) {
                                        const formControl = input.parentElement;
                                        formControl.className = "form-control success";
                                      }                                      


Step 3 - Creating a method to handle email validation

To validate the email, we will simply use regular expression and then we will use test() method for regular expressions to validate the input field

                                
                                    function emailValidation(email) {
                                        const re = /^(([^<>()\[\]\\.,;:\s@"]+(\.[^<>()\[\]\\.,;:\s@"]+)*)|(".+"))@((\[[0-9]{1,3}\.[0-9]{1,3}\.[0-9]{1,3}\.[0-9]{1,3}\])|(([a-zA-Z\-0-9]+\.)+[a-zA-Z]{2,}))$/;
                                        return re.test(String(email).toLowerCase());
                                      }                                      


Step 4 - Creating a method to handle password validation

                                
                                    function checkPasswordsMatch(input1, input2) {
                                        if (input1.value !== input2.value) {
                                          showError(input2, "Passwords do not match");
                                        }
                                      }                                      


Step 5 - Making the calls to required functions on the button click

This is pretty simple, we will add the event listener to the signup button and check for all the validation that we mentioned above and accordingly we will make the method calls

                                
                                    form.addEventListener("submit", function(e) {
                                        e.preventDefault(); //when we click on submit, it just submits, but we don't want that, we want to hold for a while
                                        if (username.value === "") {
                                          showError(username, "Username is required");
                                        } else {
                                          showSuccess(username);
                                        }
                                      
                                        if (email.value === "") {
                                          showError(email, "Email is required");
                                        } else if (!emailValidation(email.value)) {
                                          showError(email, "Email is not valid");
                                        } else {
                                          showSuccess(email);
                                        }
                                      
                                        if (password.value === "") {
                                          showError(password, "Password is required");
                                        } else {
                                          showSuccess(password);
                                        }
                                      
                                        if (password2.value === "") {
                                          showError(password2, "Password 2 is required");
                                        } else {
                                          showSuccess(password2);
                                        }
                                        checkPasswordsMatch(password, password2);
                                      });                                      


That’s pretty much it. Let’s have a look at the output and the working of the validation form.

signup form

That’s it, hope you loved the project.
Want to get hands-on JavaScript and Web development? And create amazing projects? Try Programming Hero, a fun way to learn to code.

Related Post

related post

If you spend 3–4 hours daily for 7 days, you will become a Junior Python Developer. I am providing this guideline using this android app called: Programming Hero.

related post

I am taking all the examples from the Python learning app called Programming Hero: Coding Just Got Fun